解决wsl2使用遇到的问题

本文最后更新于:2023年6月17日 晚上

1. 系统安装

1.1 选择发行版

展示选择的发行版wsl --shutdown

1
wsl --list --online

安装

建议安装Ubuntu,或者Arch 一个用的人多;一个软件新,社区活跃;Debian 日常使用软件包太老了

1
wsl --install -d Ubuntu-22.04

1.2 修改安装位置

  • 首先关闭运行的linux发行版

    1
    wsl --shutdown
  • 在D盘创建一个目录用来存放新的WSL,比如我创建了一个D:\Environment\UbuntuWSL,导出它的备份

    1
    wsl --export Ubuntu-22.04 D:\Environment\UbuntuWSL\Ubuntu.tar

    image-20230526181905016

  • 注销原有的发行版

    1
    wsl --unregister Ubuntu-22.04

    正常卸载也是这么卸载,再注销之后直接在开始菜单搜索安装的发行版名字点击卸载就可以从磁盘中删除了

  • 备份文件回复到新的子系统中,可以重命名

    import 发行版名称 新的磁盘位置 导出压缩包位置

    1
    wsl --import Ubuntu D:\Environment\UbuntuWSL D:\Environment\UbuntuWSL\Ubuntu.tar

    image-20230526182410865

  • 恢复默认用户f7kyyy

    1
    Ubuntu2204 config --default-user f7kyyy

    这里应该是纯英文或者纯数字,如果名字叫做Ubuntu-22.04就改为 Ubuntu2204

    不知道为什么,我在使用Ubuntu的时候,powershell 提示找不到命令,始终未解决。

    建议前往网站,手动下载发行版,然后将后缀改为zip,在想要安装的位置解压,然后双击.exe文件手动安装。

2. 更新系统提示

2.1 安装cuda前

你会发现没有这个文件夹

/usr/lib/wsl/lib/libcuda.so.1 is not a symbolic link

解决方法:

  1. C:\Windows\System32\lxss\lib 删除libcuda.so and libcuda.so.1

  2. 以管理员打开powershell,输入wsl,进入wsl环境,执行

    1
    2
    sudo ln -sr /mnt/c/Windows/System32/lxss/lib/libcuda.so.1.1 /mnt/c/Windows/System32/lxss/lib/libcuda.so.1
    sudo ln -sr /mnt/c/Windows/System32/lxss/lib/libcuda.so.1.1 /mnt/c/Windows/System32/lxss/lib/libcuda.so

2.2 安装cuda后

不同的系统安装位置不一样,一般来说会安装在/usr/local/cuda/文件夹下,但是我使用的是arch linux,使用pacman 直接安装会安装在/opt/cuda文件夹中

使用以下命令建立软连接

1
sudo ln -s /usr/lib/wsl/lib/libcuda.so.1 /opt/cuda/lib64/libcuda.so

3. 系统代理

3.1 系统代理

wsl1没有独立的IP,可以直接给127.0.0.1:port,进行代理

更新wsl2后,需要使用正则获取IP地址

在.bashrc,.zshrc中加上

1
2
3
4
5
# >>> setproxy >>>
export hostip=$(cat /etc/resolv.conf |grep -oP '(?<=nameserver\ ).*')
alias setproxy='export https_proxy="http://${hostip}:10811";export http_proxy="http://${hostip}:10811";'
alias unsetproxy='unset all_proxy'
# <<< setproxy <<<

config.fish

1
2
3
4
5
6
7
8
9
# 设置代理
function unsetproxy
set -e ALL_PROXY
end

function setproxy
set hostip $(cat /etc/resolv.conf |grep -oP '(?<=nameserver\ ).*')
set -xg ALL_PROXY http://$hostip:10811
end

注意端口,在windows代理软件中打开allow LAN,或者允许局域网代理
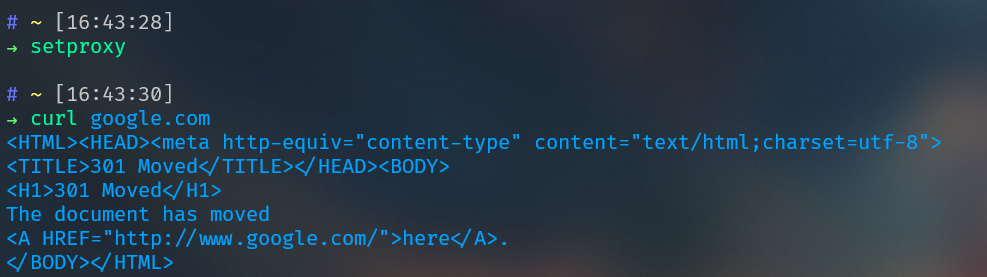
测试

执行setproxy后,curl google.com,返回html文件
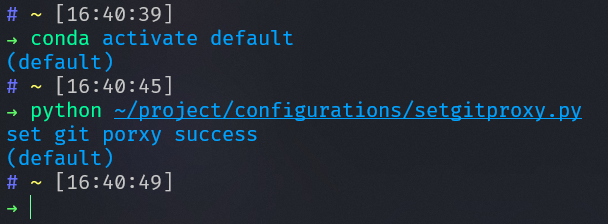
image-20220508164357859

3.2 为git设置代理

写一个简单的python 脚本setgitproxy.py,为git设置代理

先使用pip安装IPy

1
2
3
4
5
6
7
8
9
10
11
12
13
14
15
16
17
18
19
20
21
22
23
24
25
26
27
28
29
30
31
32
33
34
35
36
37
38
39
40
41
42
43
44
45
46
47
48
49
50
51
52
53
54
# coding=utf-8

import socket
import fcntl
import struct
import os
from IPy import IP

# 本地代理端口,你的和我不一定一样,按照自己的设置改动一下
PORT = 10811


def get_ip_address(ifname):
s = socket.socket(socket.AF_INET, socket.SOCK_DGRAM)
return socket.inet_ntoa(fcntl.ioctl(
s.fileno(),
0x8915, # SIOCGIFADDR
struct.pack(('256s').encode("utf-8"), (ifname[:15]).encode("utf-8"))
)[20:24])


def get_windows_ip(wsl_ip):
ip = IP(wsl_ip).make_net("20").strNormal()
ip = ip.split('/')[0][:-1] + '1'
return ip


def config_git_proxy(ip):
config_str = (
"git config --global https.proxy 'https://%s:%d'" % (ip, PORT))
# print(config_str)
ret = os.system(config_str)
if ret:
print("set git porxy fail")
return
else:
config_str = (
"git config --global http.proxy 'http://%s:%d'" % (ip, PORT))
# print(config_str)
ret = os.system(config_str)
if ret:
print("set git porxy fail")
return
else:
print("set git porxy success")
return


if __name__ == "__main__":
wsl_ip = get_ip_address('eth0')
windows_ip = get_windows_ip(wsl_ip)
# print(windows_ip)
config_git_proxy(windows_ip)

使用git 命令或者其他git GUI客户端前,执行python setgitproxy.py为git添加代理

image-20220508164137335

最新更新,Clash Tun 模式使用全局代理解决一切问题